Import Hours Worked from Time Control
This is done in the Payroll Module. It brings the hours recorded in Time Control (normal time, overtime and shorttime) onto employee payslips. Leave is imported separately: see Import Leave Records into Belina Payroll. If you use another payroll system, see Export Hours Worked to a Spreadsheet.
Take an interim backup before importing, so you can restore the earlier state if something is wrong.
Before you start: all clockings are processed, overtime is authorised, adjustments are done and the Calculation Routine has run. Whether actual hours or overtime/shorttime hours are exported is set in Attendance Defaults (Export Times As) or per employee in the Employee Master.
Import time records from Time Control
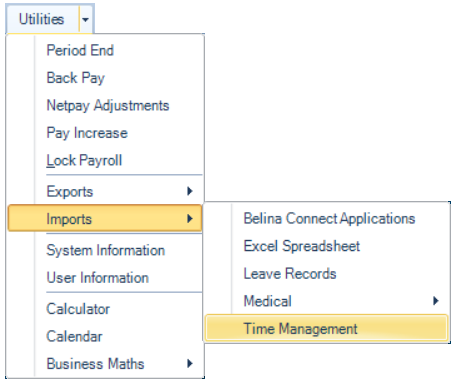
- In the Payroll Module go to Utilities > Imports > Time Management.
-
A warning recommends a data backup. If one has been done, press Yes to continue.
-
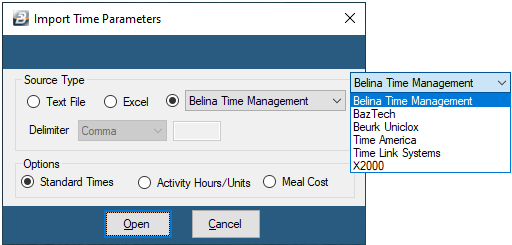
The Import Time Parameters screen appears. Make the required selections: Source Type: keep the default Belina Time Management if you use Belina Time Control. For another time recording system, pick its software from the dropdown. For a text file or Excel, use the spreadsheet import below.Options: Standard Times: imports normal time, overtime and shorttime.Activity Hours/Units: imports hours on a particular job, or units of work done.Meal Cost: marked as under construction in the old manual.
-
Press Open.
-
The Range Selection screen appears. Normally import by date range. Use tagging or choose the employees to include.
-
A screen lists the selected employees. Check the details, then press Next.
-
The next screen shows a table with many columns. Scroll right to see all of them.
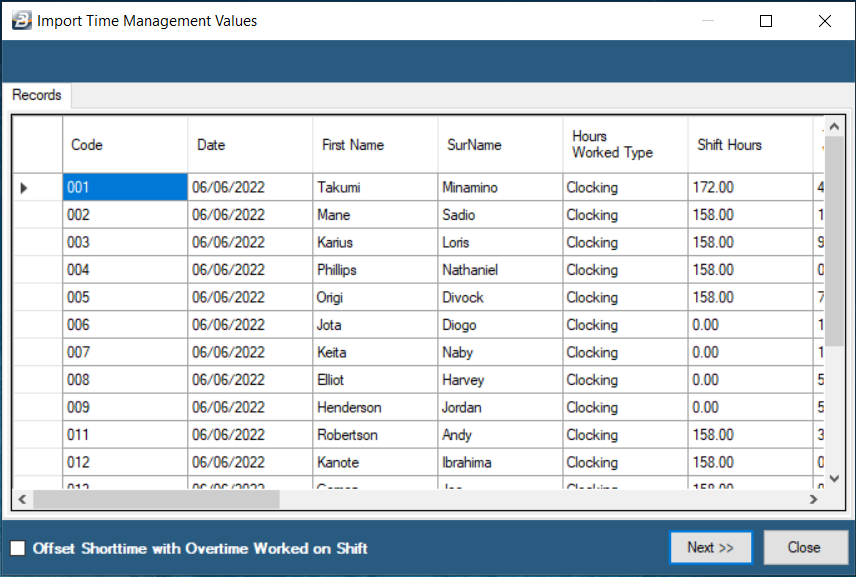
| Column | Meaning |
|---|---|
| Shift Hours | Standard scheduled hours for that shift rotation |
| Total hours worked | All shift hours worked, including overtime and any extra hours before or after the shift |
| Shift hours Worked | Actual hours worked within the scheduled shift |
| Extra Time | Shorttime offset against overtime, giving a positive or negative figure. Example: 4 hours shorttime and 8 hours overtime gives an Extra Time of 4 |
| Overtime Authorised | Hours authorised |
| Overtime Unauthorised | Total overtime minus authorised hours |
| Overtime Worked Shift | Overtime recorded on scheduled shifts in the date range |
| Overtime Worked - Weekend | Overtime recorded on Saturday and Sunday in the date range |
| Overtime Worked - Off Day | Overtime recorded on off days in the date range |
| Overtime Worked - Holiday | Overtime recorded on non-shift days in the date range |
| Short Time | Hours an employee should have worked but did not |
| Night Shifts | Number of night shifts worked in the date range |
| Night Shift Hours | Total hours worked on night shifts in the date range |
- Tick Offset Shorttime with Overtime Worked on Shift if shorttime hours should be offset
- Press Next.
- The assignment screen appears. Assign each Time Management field to the matching payroll Transaction Code: select the field on the left, then tick the transaction code on the right. Once assigned, the pairing shows in the second column of the Time Management side.
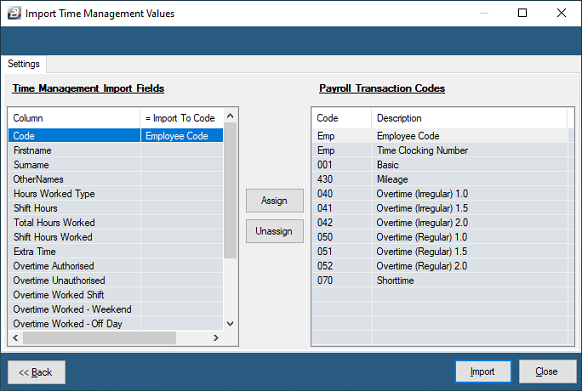
- Repeat for each field you want to import.
- Press Import. The import report opens listing the imported transactions.
- Check a few employees in Payslip Input.
Import time records from a spreadsheet (another time system, or a file from Time Control)
Importing can significantly change existing data. Take a good backup first.
If the file comes from Time Control, first create it with Export Hours Worked to a Spreadsheet.
- In the Payroll Module go to Utilities > Imports > Time Management.
- Use the ellipsis button to select the file.
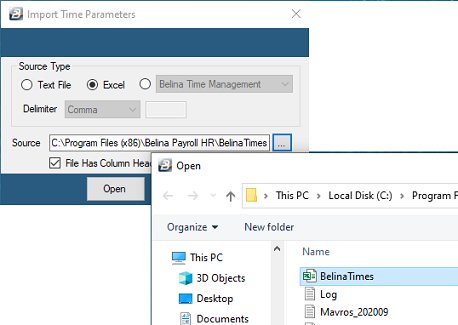
- Choose Text file (then enter the field delimiter, for example a comma) or choose Excel.
- Tick the box if the file has column headings.
- Press Open to view and check the file, then press Next. Show Image
- Map the Employee Code in the file to the payroll Employee Code: click the field on the left, then the field on the right, then Assign.
- Map each data field to a Transaction Code listed on the right.
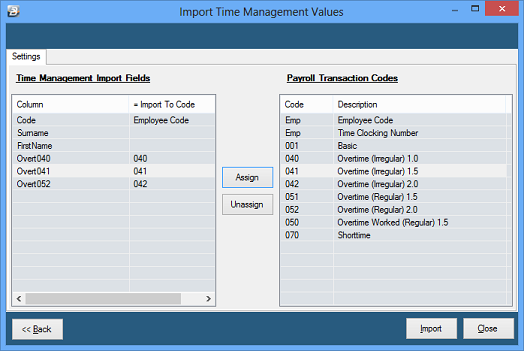
- Press Import.
- A warning says transactions are about to be placed on employee payslips. Press Yes to proceed.
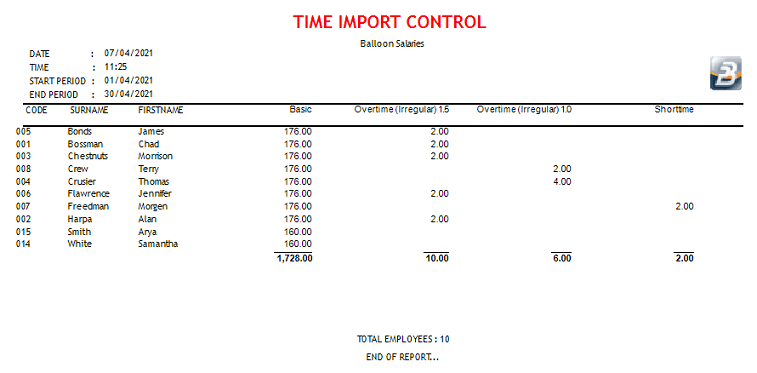
- An import report opens automatically, listing the imported transactions.
Was this page helpful?